Self-Watering Vertical Planter Makes Vertical Gardening Easy!

Self Watering Vertical Planter Kit

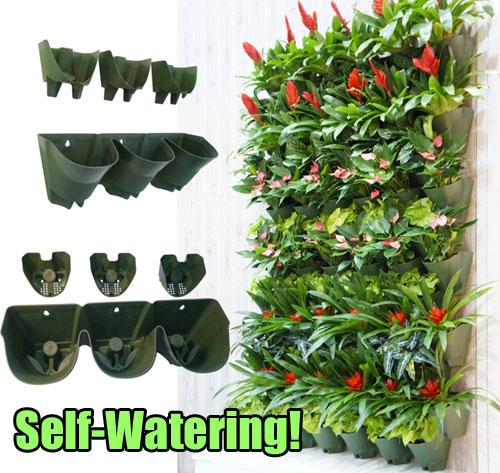
I think giant living walls look really cool. However, the thought of installing or constructing a massive vertical garden seems like a lot of work. That’s why I love this self-watering vertical planter because it makes vertical gardening easy. (Not to mention good looking!)

Self Watering Vertical Planter Kit

I’d rather build a large vertical garden out of small parts and piece them together in smaller manageable sections. Of course, I’d want the finished product to look like one big living wall as opposed to several small planters.

That’s why this vertical garden kit caught my eye. This self irrigating planter has a super simple design and is easy to piece together. At the same time, the end result appears to be a single wall planter.

You could even use a row of these containers underneath a window instead of using the typical planter boxes. Not only are they lightweight and easy to attach to a wall or wooden railing, but you can combine multiple segments to create the length of planter you need.

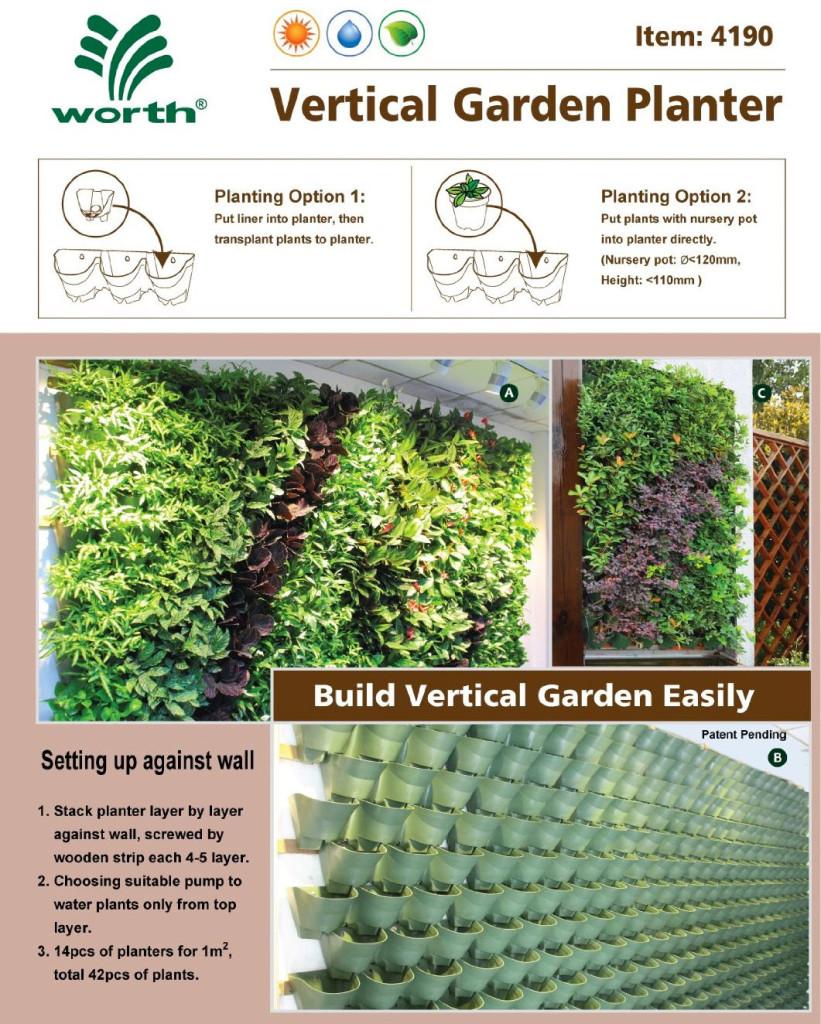
They are also conveniently designed to hold individual flower pots, so you can easily remove and replace plants as you like. This feature is really nice for a seasonal herb garden or planting colorful annual flowers each spring, summer and fall.

Worth Vertical Planter System on a Wall

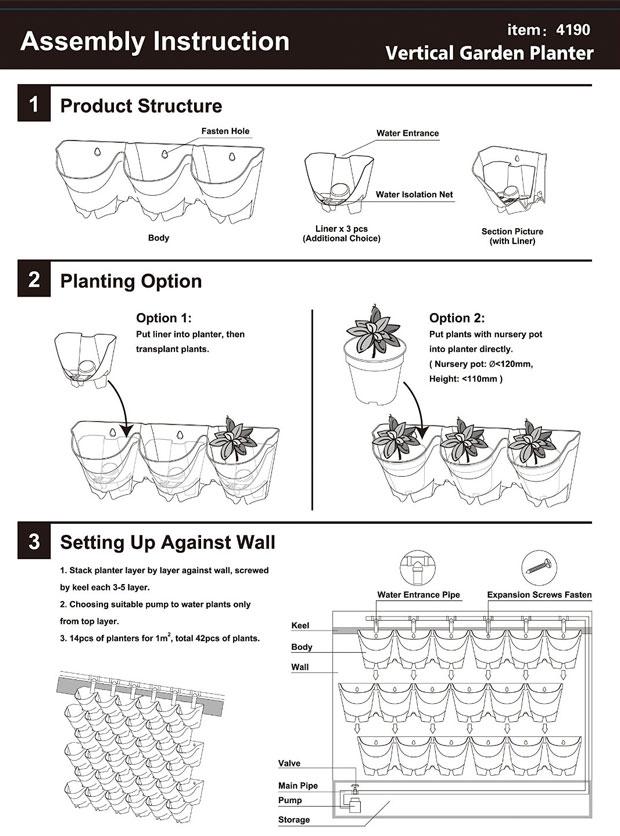
The High-Tech Design of the Self Watering Vertical Planter:

In addition to being simple to set up and install, this vertical garden also is designed with a water-conserving professional grade irrigation system. Save water, save money and save time all while growing healthier and happier plants. An automatic watering system drips water into the top level of your garden, and the underlying levels are watered one after the other through a trickle-down system that is built right into the planter.

3-Pot Section of the Worth Vertical Planter Automatic Watering System

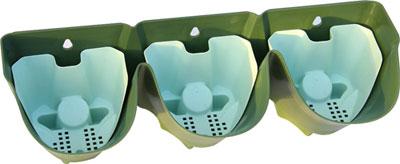
The Worth Self Watering Vertical Wall Planter is sold in 3-pocket sections and included a filter layer that is removable. Place soil and plants directly into the pockets or insert potted plants with the pots.

The filter layer helps plants “breathe” and grow healthier, plus the reservoir keeps plants watered up to two weeks, depending on climate and species.

Vertical Planter Assembly Instructions

Make your living wall as large or as small as you like. You can also design your garden in a unique shape or design. On to of that, you can use it indoors or out. And if that wasn’t enough, the containers are safe for growing edibles (made from recycled propene polymer).

Dimensions: 19″ long x 7″ tall x 7″ deep


DIY Green Wall Made Easy in 4 Simple Steps

4 Steps to a DIY Green WallFor some people, a small vertical garden is perfect. However, there are some of use who want to completely cover a wall or fence with greenery. This can be to disguise an ugly structure, increase privacy or simply create a work of art in the form of a natural “plant wall”.

Decorating with green walls has become more popular as this art has been incorporated into modern architecture of large eco-focused cities.However, the task of building a DIY green wall can seem overwhelming for the average homeowner.

It doesn’t have to be, though. Here are some key points to keep in mind.

Focus on Planning to Minimize Maintenance and Work

A bigger garden doesn’t necessarily mean more work – but it does require more planning. Specifically, I am talking about the irrigation and drainage of the garden and of course the weight imposed on the attached structure.

Be a Lightweight

First, let’s talk weight. If possible, choose a strong, secure wall to build your garden. Keep in mind that not only do you have the weight of the container(s), but the plants, soil and water also tack on some pounds as well.

Using small-leafed greenery that requires less soil and water can significantly help this situation. You can minimize weight in 3 different aspects by doing this. That is one of the reasons why succulents are such a popular option when it comes to vertical gardening.

Create a High-Tech Watering System… that’s Not Really High Tech

Irrigation is also more important with a larger arrangement because you don’t want to spend all of your time watering. One way to do this is to layer the planting containers in rows so that the upper containers drip into the lower ones and so one. You will only need to manually water to top row yourself.

Another option is to install a drip irrigation system that runs on an automatic timer. This is often preferred for plants that need water more often or tend to dry out faster. Compared to a small planting container, drip lines can easily be hidden behind foliage of the green wall plants, especially once they have had time to grow and develop.

What’s an Easy Way to Handle Drainage?

Some vertical gardens use a receptacle at the base to catch excess water. Water can also be diverted to a nearby garden bed using extra drip line. This plastic garden tubing is an inexpensive and simple way to direct water where you want it, and often you can conceal the hose behind or below items so you don’t even see it.

The video below shows how to build a green wall, including creating some of the irrigation and drainage ideas we discussed above.


Click here for more information