The cool thing about vertical gardening is that there are so many ways you can create your garden. You don’t necessarily have to buy a pre-made kit or know how to build one yourself.
Here’s one great example….
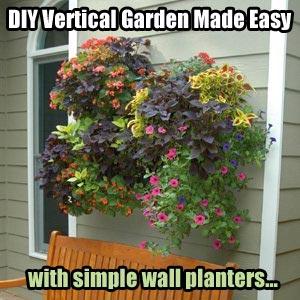 As you can see in the image on the right, we’ve got a beautiful vertical garden on the side of a home. What you don’t see is that is it basically made with 4 lined wall planters that are covered and completely concealed by the plants themselves. It looks like the foliage is growing right out of the house. Pretty cool, huh!
When these containers are positioned individually, they can make a front entryway or back patio look attractive. However, when they are arranged together in groups, they can transform a plain wall or fence into a stunning work of art.
Affordably Priced:

In addition, these wall planters are priced lower than many other vertical garden options when you consider their size (20″) and number of plants that they hold (12 side plants + 12 top plants + two 1-gallon centerpiece plants). They provide a great way to dip your toe into the vertical gardening world without getting too complicated, costly or work-intensive.
Another option is to get the smaller 16″ containers or 14″ Planters for $7.89!.
Perfect for Beginners:
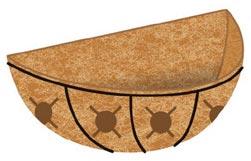 The fact that they are simple planters that are manageable in size makes them ideal for beginner gardeners – or people who don’t have a lot of patience. This special design has areas on the sides of the container (shown on left) for planting around the container – not just from the top.
This makes for easier planting and a faster-growing arrangement. Heck, you can have an entire green wall planted in an afternoon, and you can do it by yourself!
2 Potential Drawbacks:
 One downside is that it will take time for the planters to be completely covered with leaves and flowers. You will need to allow time for the foliage to grow.
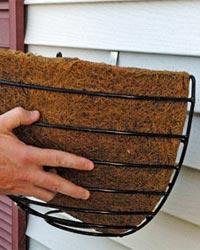
Another drawback is that these are not watertight containers. The photo shown here (with similar model) has the wall planter attached to vinyl siding. Attaching them to stucco or concrete siding would be ok, but if you wanted to attach your garden to a wood fence or wood siding, I would suggest placing a plastic layer between the container and the wall or fence to which you hang it.
All that said, this is a creative DIY vertical garden project that can make your planting project more enjoyable and sophisticated-looking. You can even remove them from the wall to re-plant, move, etc… Very convenient!