
Do you want to make a unique, homemade gift for a friend? Succulent gardens have that hand-crafted look, yet they don’t require lots of skill. In fact, you can simply buy a frame, soil and some succulent plants.
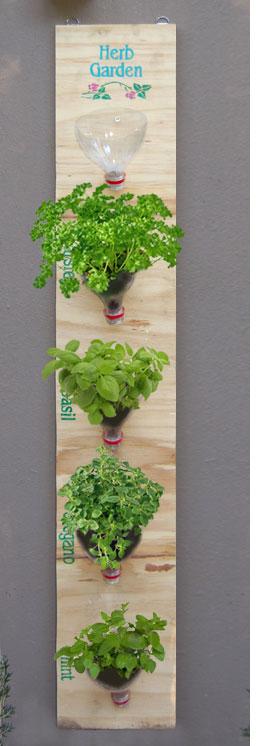
Vertical gardens can be great gifts for virtually anyone. They can be used as decor in homes and offices, they can be filled with herbs for a living herb garden, they can be grown inside or outside and they even make a fun craft project for kids.
3 Ways to Make a Vertical Garden Gift:
This first option is to buy a pre-made vertical garden frame that is ready to be filled with plants and soil. The is the easiest way to make your vertical garden, and depending on the size of the kit, they aren’t necessarily expensive.
The second option is to build the frame yourself. The video below shows you how. It’s pretty basic, but you will need some tools, including a saw, drill, sandpaper and some screws. You will also want to stain or paint your frame to protect the wood from any moisture (and of course to look nice). If you want a natural-looking frame, simply get a clear varnish.
The third option is to make a few tweeks to the above “make-it-yourself” option to cut your costs even more (and maybe use some materials that you already have laying around the house – which is what I did).
How I Saved Money on Vertical Garden Materials:
I had some wood scraps leftover from a fence project and some bird netting (also called polypropylene mesh if you’re shopping for it) from my vegetable garden that I figured I would use. Instead of building the planter box behind the frame with wood, I thought I would try using one of those foil banking pans instead.
Besides being less work to build and fewer materials to buy, the foil is significantly lighter in weight. I also decided to use a perlite and sphagnum moss soil mixture that is also lightweight. When completed, I think my entire 18″ x 19″ vertical garden frame and planter weighs less than 5 pounds (and that includes soil and plants too).
Note: It’s not necessary to lighten the load of your garden. Smaller-sized planters aren’t heavy anyway. However, it’s a nice option in case you are interested.
Although most of my materials were free because I already had them, here’s what it would have cost if I had to buy everything:
- Wood Fence Picket (6′ x 5 1/2″) $1.75
- Metal Brackets with Screws $1.75
- Sphagnum Peat Moss $4.50
- 2 (8″ x 8″ x 1 1/2″) Foil Pans $1
- Roll of Gutter Guard $4 or Hardware Cloth $6.50
- Succulent Plants $10-12 (or less)
5 Steps to Making a Framed Garden:
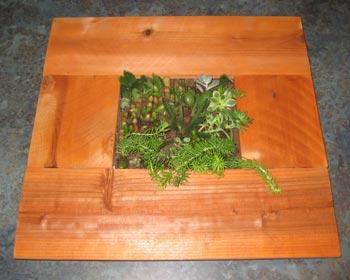
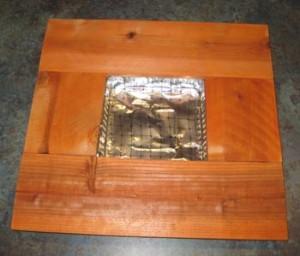
1. I started by measuring the wood frame pieces to fit around the foil pan. By the way, I ended up using 2 foil pans stacked inside each other for extra sturdiness for the planter (they were sold in packs of 2 anyway, so it didn’t cost me any more money). I got the 2-pack of 8″ x 8″ pans at Dollar Tree for $1. They are about 1 1/2″ deep, which is perfect to hold enough soil for succulents while also being compact.
2. Next, I cut, sanded and stained the frame. I attached the 4 sides together with small flat metal brackets I bought at Walmart for less than $2.
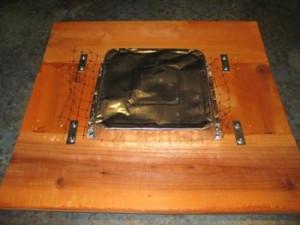
3. Next, I cut a piece of netting and stapled it to the back side of the frame. You could also use wire mesh hardware cloth, gutter guard screen, chicken wire or weed fabric instead.
4. Then, I stapled the foil pans to the back of the frame on top of the netting I had just attached. The foil pans were really easy to work with because they are pliable and can be shaped right where you want to staple them (even if you don’t measure your frame exactly right).
Notice in the photo that I bend one side of the foil inward. This will be the bottom side when the planter is handing upright. The folded side will help catch and keep in any excess water so that it won’t drain right out. If you use succulents like I did or other plants that don’t require lots of water, this probably will not be an issue – it’s *just in case*.
5. Last, I poured the moss and perlite soil mixture into the pan through the holes in the netting. By the way, my starters were small enough that I didn’t need to cut any holes in the net. This is a nice advantage to using smaller plants.
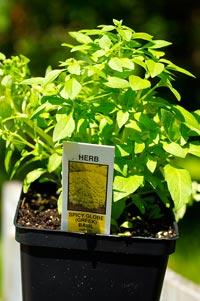
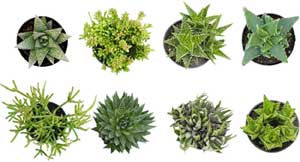
As far as buying succulents, you can get a bunch of starters or get larger plants and take multiple cuttings off one plant. Succulent cuttings are easy to propagate, but keep in mind that they can take a few weeks to grow roots, which of course will keep them from falling out of the garden.
In my case, I was gifting my vertical succulent planter to myself, so I could wait weeks for the cuttings to root before I hang my planter on a wall. That’s why you see so many smaller cuttings rather than larger blooms.
I really like how my garden turned out. The fence panel scraps were the perfect size (5 1/5″ wide and 1/2 thick) so that they make the garden appear large without having to buy lots of plants, and they are thin enough that they don’t add a lot of weight to the frame.